Objective: To observe the relationship between various elements and their emission spectrum.
Introduction:
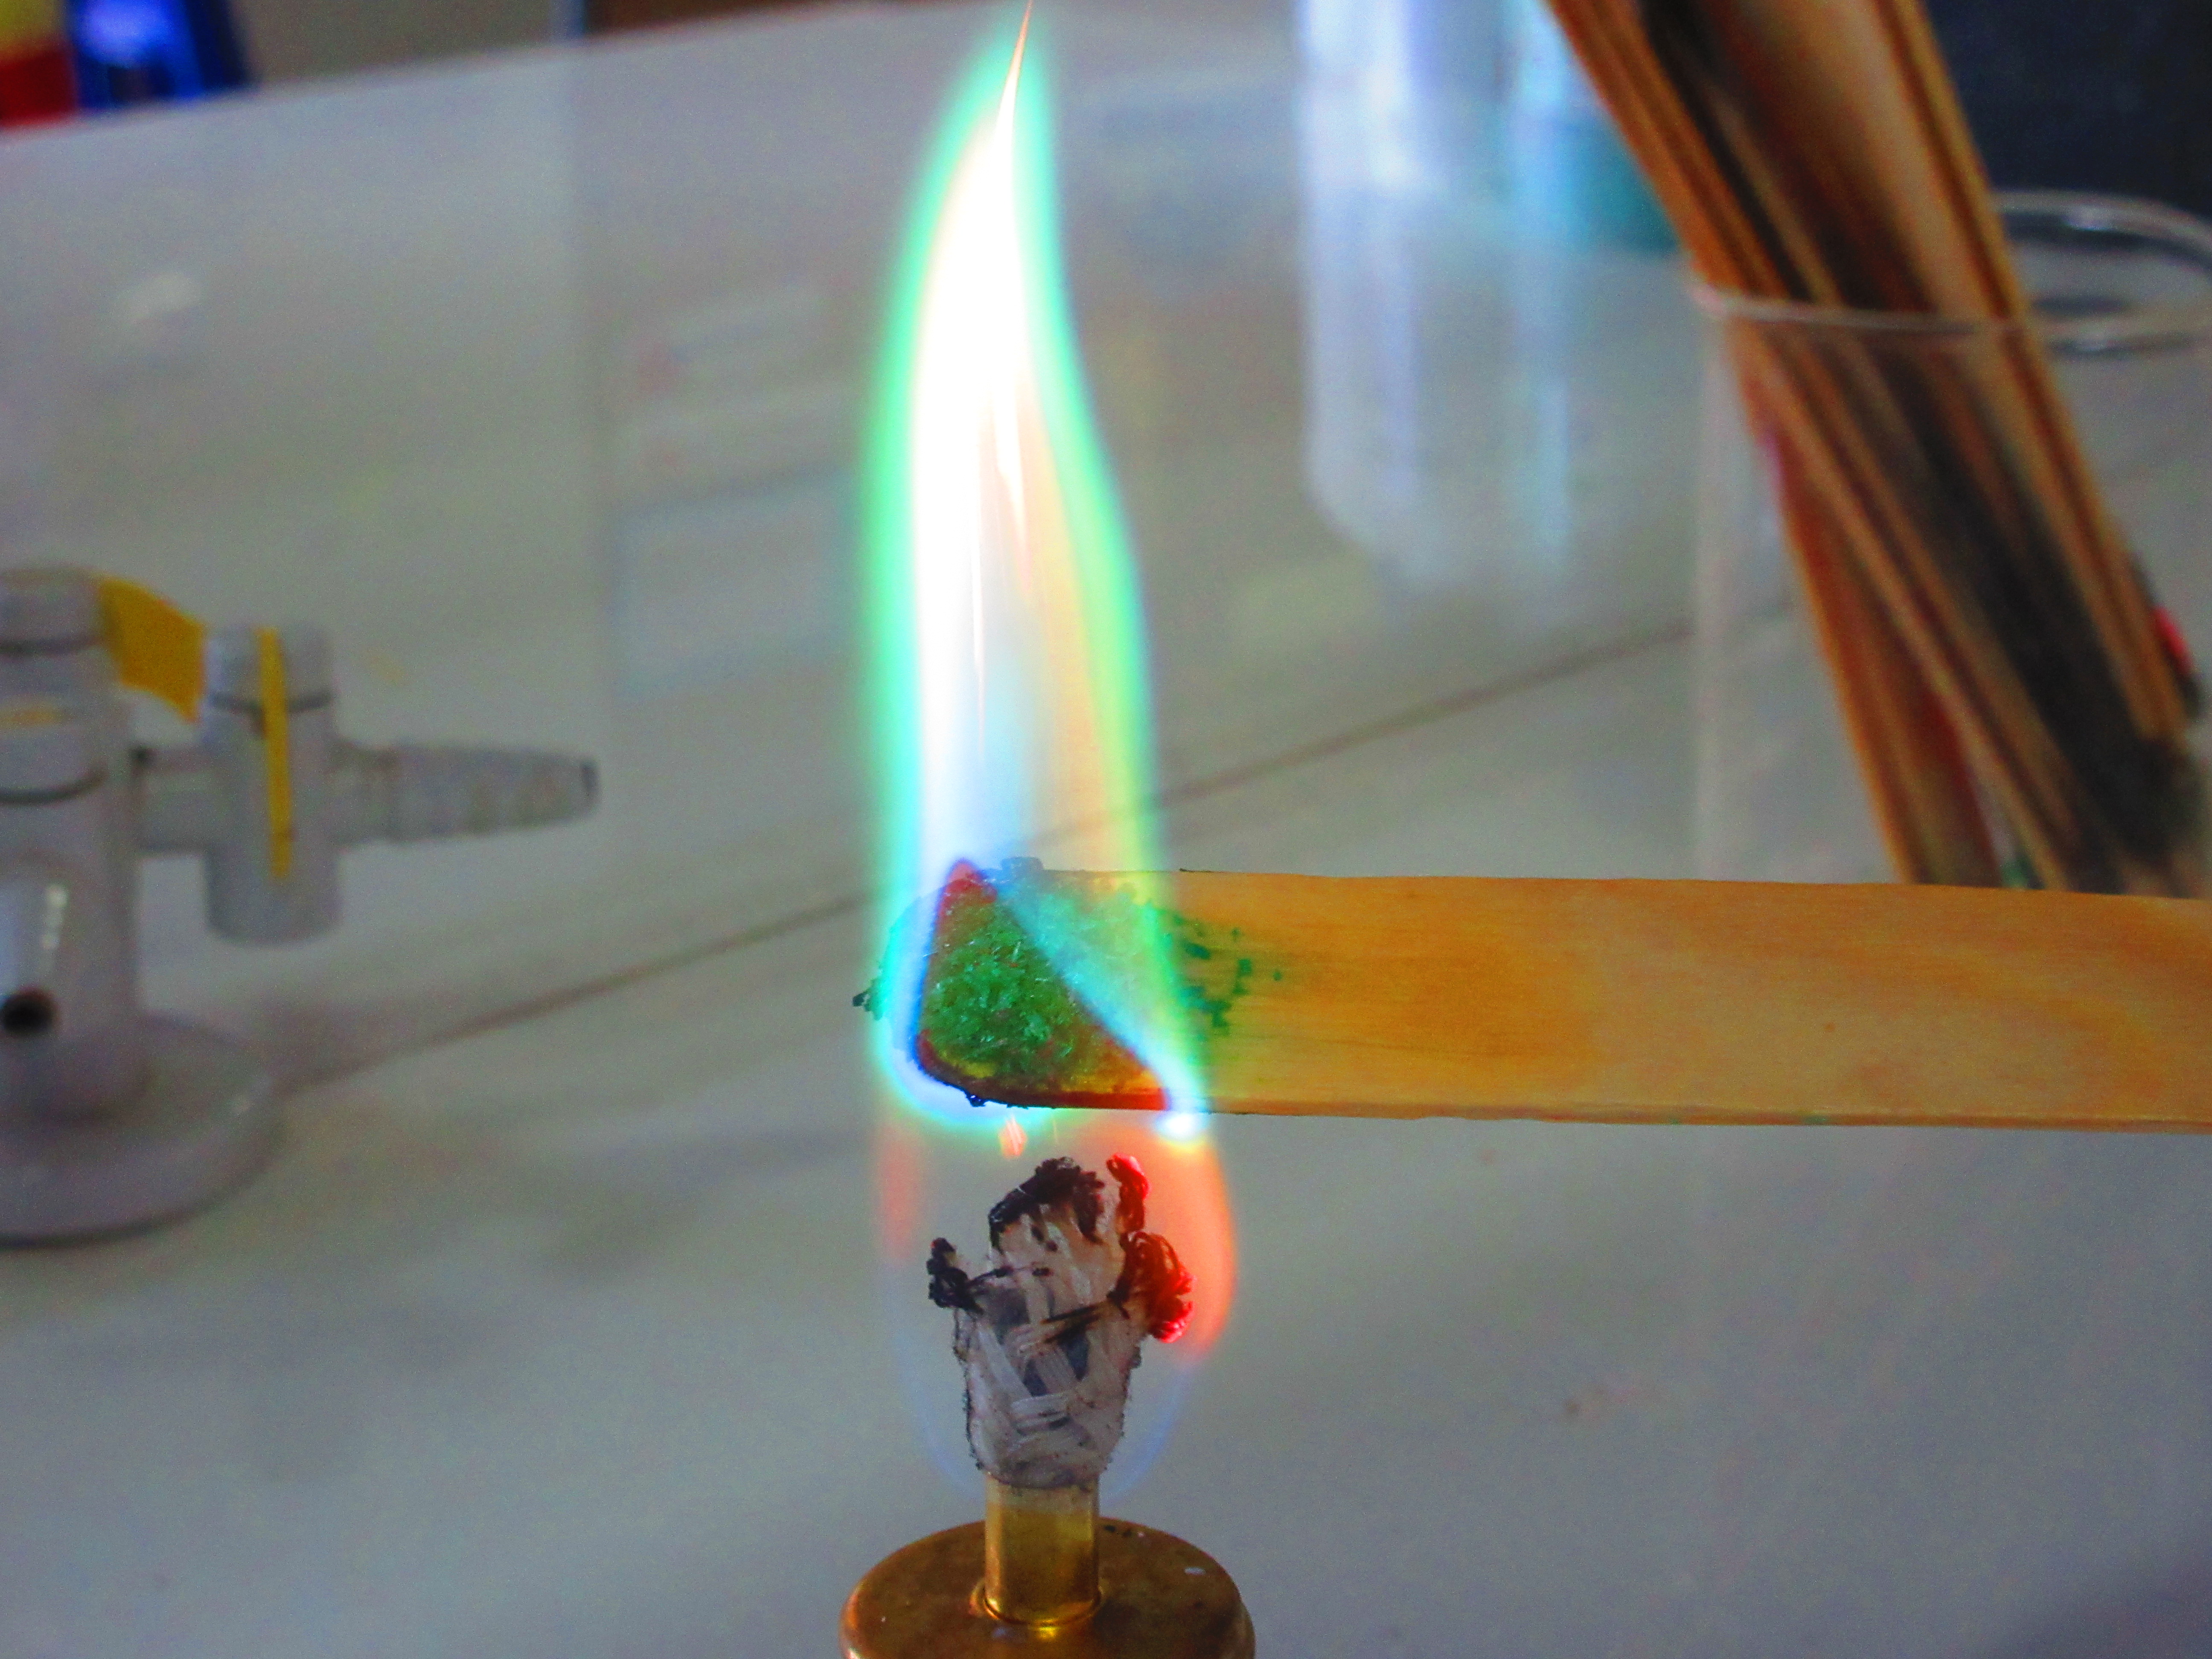
Flame tests provide a way to qualitatively test for the presence of specific elements by seeing colored flames. The heat of the bunsen burner excites the electrons in the atom, and this energy is released as the electrons “fall back” to their ground states. The color we see is a combination of the visible wavelengths of light emitted by the atoms.
If you have a spectroscope you can also make quantitative observations. A spectroscope can be used to see a pattern of narrow lights called an emission (bright-line) spectrum. The actually wavelengths of the spectrum serve as a quantitative test to determine atoms identities. Each element has a different “pattern” of electrons so it will show a different combination of colors.
In this lab, you will perform flame tests on seven different elements. You will use your observations to identify an unknown solution.
Prelaboratory Questions: (In a section labeled PRELAB- answer the following questions in FULL sentences)
- Why do we see colors in the flame tests?
The increase in temperature makes the electrons excited and move to a higher energy level. They produce visible light as they return back to the ground state.
- How will we be testing the substances qualitatively?
One way could be comparing the color of flame (of each element) with the Bhor model.
Materials:
Safety goggles, wood splints, tongs/tweezers, Bunsen burner, test tubes with various compounds
Safety:
- Safety goggles must be worn at all times
- Many of these salts are toxic. If you come into contact with any of the compounds make sure to notify the teacher and wash the contacted area thoroughly. Wash your hands before leaving the lab!
Procedure:
- Light the Bunsen burner (turn the gas on so you can just hear it, then use the striker)
- Place the wood splint for each compound into the flame using tongs or tweezers- ONE AT A TIME!
- Take note of the color of the flame and return the wood splint to the solution.
- CLEAN UP YOUR STATION! Carefully put the stoppers back on the solutions! Make sure the station looks like it did when you started! Let me know if you need new splints!
- Wash your hands thoroughly before leaving the laboratory
Data Table: make a section of your lab labeled Data Table and make a data table similar to the one below to record your observations.
| Compound | The color of Flame (qualitative) | Wavelengths of light (in Å) (quantitative) |
| Barium Chloride | Yellow (light) | 600 nm |
| Calcium Chloride | Orange | 630 nm |
| Copper (II) Chloride | Green | 550 nm |
| Lithium Chloride | Red | 665 nm |
| Potassium Chloride | Pinkish-orange | 647.5 nm |
| Strontium Chloride | Red | 665 nm |
Discussion and Analysis: (In a section labeled Discussion and Analysis answer the following questions in complete sentences)
- How do your results from the flame test provide support for quantized energy levels? Explain your answer.
The heat made the atom’s element excited and move to a higher energy level. The atoms emitted photons of visible light while returning back to the ground state.
Conclusion: (answer in a complete paragraph and in complete sentences)
What are two possible sources of error for this lab? How would the errors affect your lab? What would you do differently next time to counteract these errors?
There were many barriers in this experiment: the inconsistency of how much element should be put onto the stick, how to make sure the flame is actually burning the element but not the stick. These sources of error can lead to the inaccuracy in color of the flame. If we were to redo this lab, we need to make sure that the same amount of element goes on the stick and that the flame is actually burning them. We should repeat each burning process at least three times for each element.